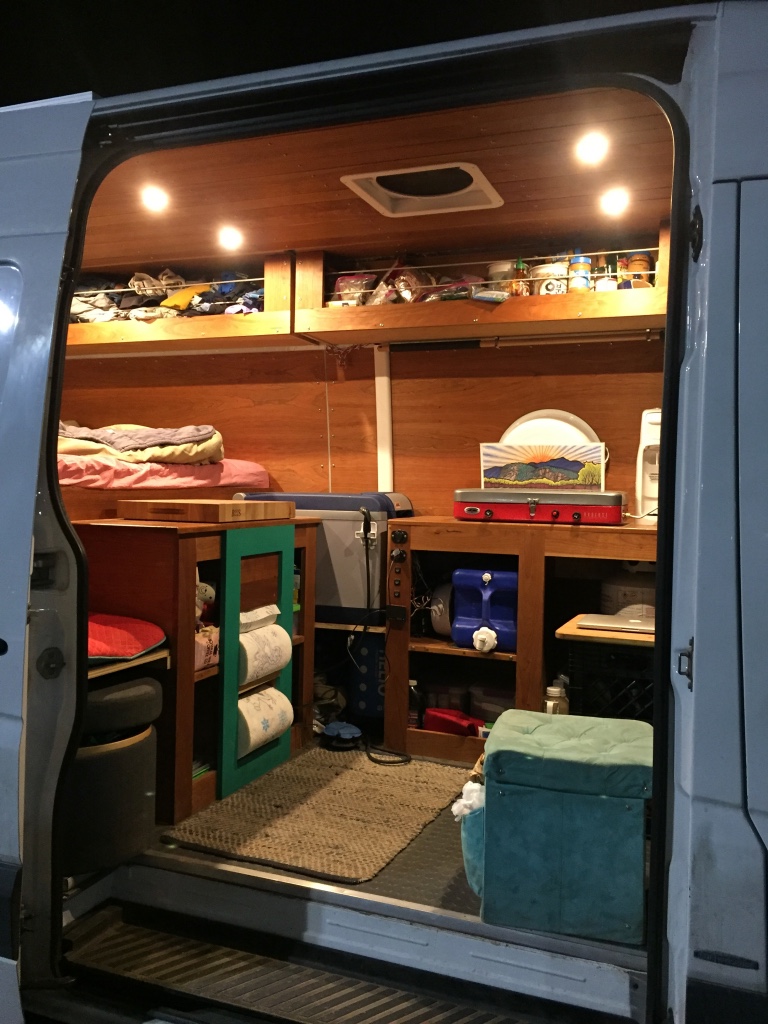
When I left Boston in August of 2016 the van build-out was just barely finished. The cabinetry was installed literally the day before I left home and the fridge had only been turned on once. Although the interior space was livable, it was far from complete. Some things I simply didn’t have time to finish, but there were plenty of projects that were good ideas, but hadn’t fully congealed in my head. I wanted to wait until I’d lived in the van for a while before installing anything permanent that might not work out in the long run. So this post is all about van updates that I’ve made based on my experiences thus far.
Light switches & USB ports
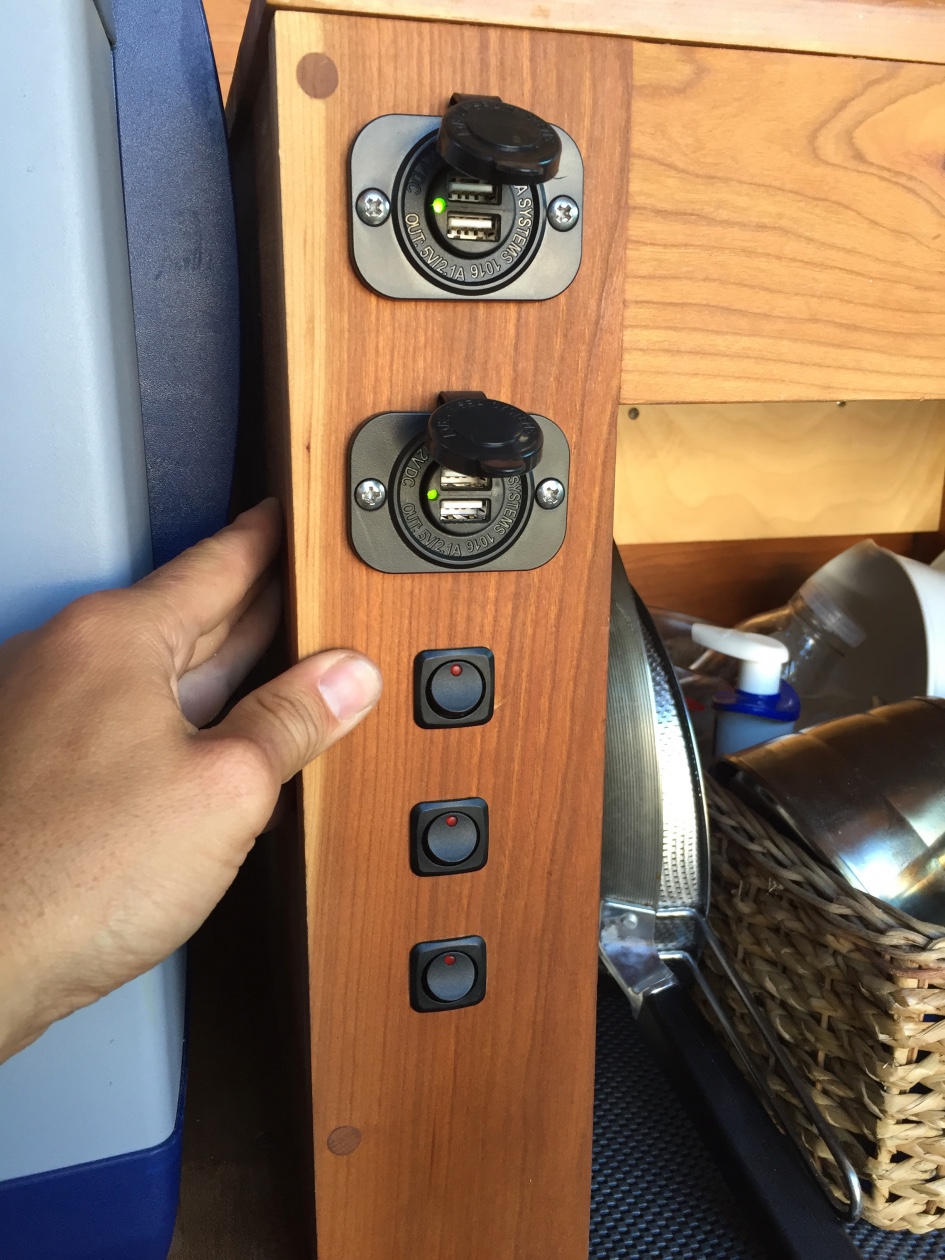
I have six dimmable LED puck lights installed in the ceiling. The fact that they are dimmable means that I can conserve battery power by dialing down the intensity. Although this is great, I could save even more power by turning some of the lights off completely. This idea came from my friend Matt Thomas. There are two lights over the bed, two over the food prep area, and two over the lounge area. I decided to install three light switches to turn off each pair of LED’s. I really wanted to use some Blue Sea rocker switches, but A) they cost more than gold, B) they’re difficult to install, and C) they’re not exactly low-profile. In the end I bought several round rocker switches from Home Depot. The fact that they’re round means that I can use a hand drill to make the holes. Square holes are much harder to make, especially on the road. The only problem with these guys is that they require a metric diameter mounting hole and all my hole saws are in Imperial units. I had to cut holes using a 3/4″ hole saw and the hand sand the hole a few millimeters to accommodate the switch barrel. Really tedious and annoying, but fairly mindless.
Up to this point I’d only been able to charge electronics while the van was running. I had no USB ports connected to the house battery. No bueno. I purchased two Blue Sea panel mount USB ports from West Marine, which also require a round install hole. This was a game changer and are now an essential part of van life.
Stove & propane tank
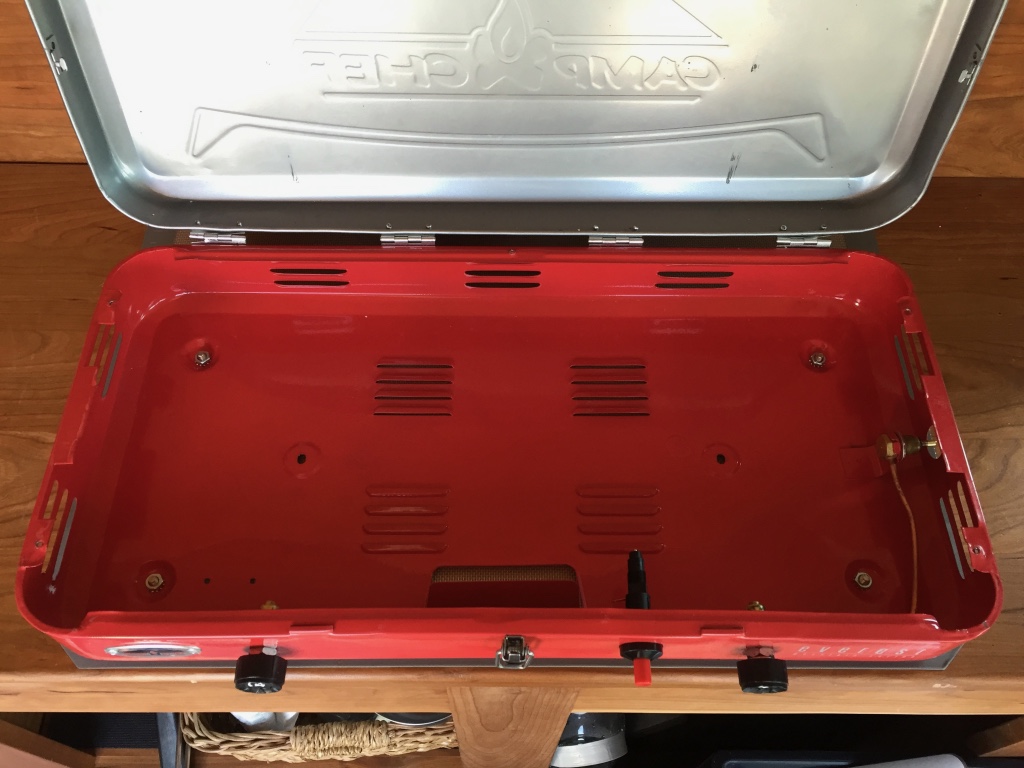
Initially I rejected the idea of securing the stove to the countertop. I was reluctant to drill holes in my beautiful brand-new cherry counters. I also thought that I would be cooking outside the van as much as possible, but it turns out this is more of a hassle than it’s worth. Cooking in the van with the fan running works great and is a lot more convenient than schlepping everything in and out of the van every night. Although I purchased a propane hose adapter, I hadn’t yet committed to a large propane tank. I’d been using the small green Coleman bottles, which are small, expensive, and not easily recycled. A total bummer. Get yourself a standard size 20 gal propane tank from Home Depot. It will cost about $45 for your first tank and then refills are $20. Many place will simply exchange your empty tank for a full one without having to go through the hassle of a refill. My first tank has lasted months without having to be exchanged. I secured the tank using a black rubber bungee and some screw eyes, pretty easy.
The most important lesson I’ve learned about living in a van is that anything not bolted down will most certainly become dislodged, fly across the van, and break. When this happened to the Boos butcher block, it put a hole in my cherry plywood wall. Super annoying. Both the stove and the Boos block needed to be secured tightly. The Boos block was no problem, four holes, 4 bolts, done. The stove posed more troublesome. I considered various strapping methods and magnets, but ultimately I ended up modifying the stove and bolting it down. I disassembled the stove completely and drilled holes through the feet on the bottom. Then I used epoxy to glue threaded nuts over the holes on the inside of the stove housing. The stove could then be secured to the counter using standard bolts. Another good idea is to install a silicone baking sheet under the stove to protect the countertops from getting scorched. To keep the stove elements from rattling, I placed a rubber shim under them, which needs to be removed before use.
Cargo netting
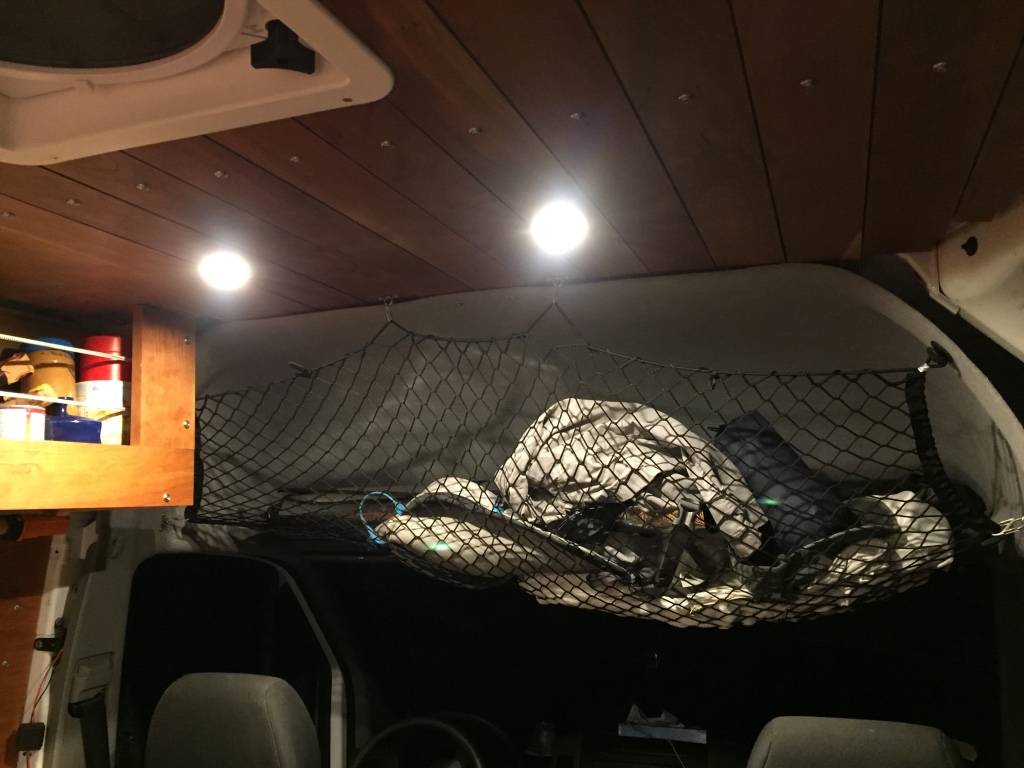
I really wanted to install a shelf in the headliner before leaving Boston. I got as far as cutting the wood before I ran out of time and had to leave. Turns out I’m glad I didn’t, I ended up installing a cargo net instead. This is great for storing jackets, towels, hats, etc. Anything that isn’t too heavy. The netting is very stretchy, so I tied off the bungee cords a lot to reduce the sagginess as much as possible.
Milk crate table
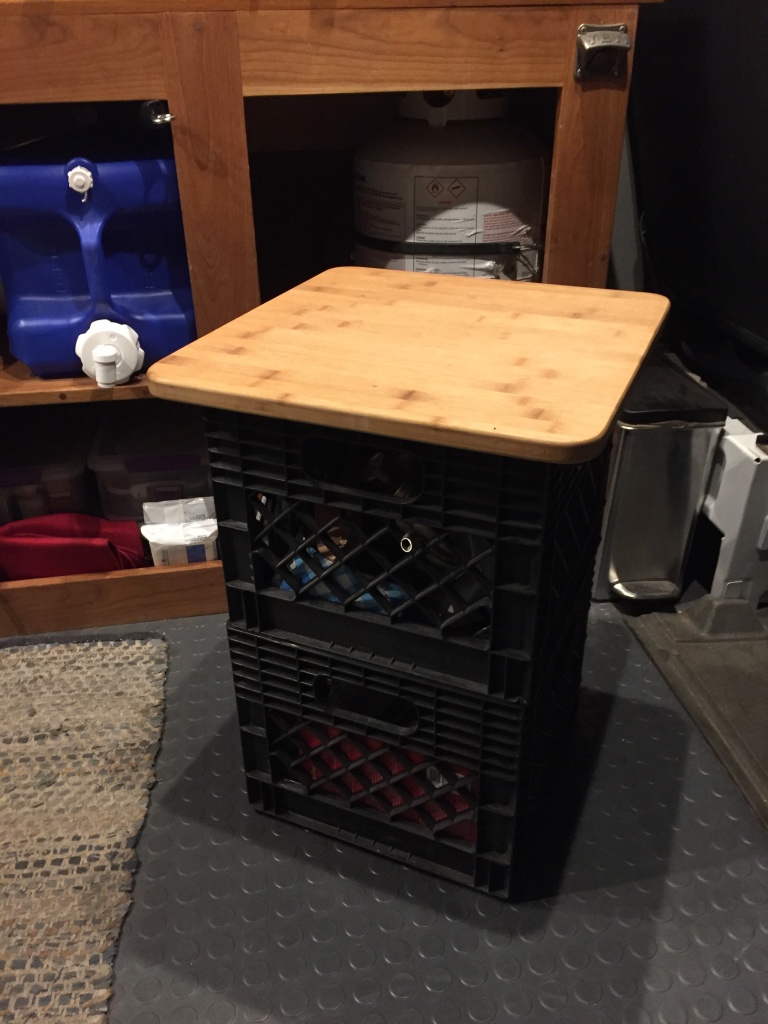
I really needed a small table. You know, somewhere to put my beer or my breakfast bowl while writing blog posts 🙂 Lesson #2 in the school of vanlife, anything that isn’t dual purpose is wasted potential. My table needs to contain storage. After assessing the options at Bed, Bath, & Beyond, Target, Walmart, etc I can to the conclusion that everything out there A) sucks and B) is way too expensive for what you get. My solution is low cost, functional, and looks pretty nice I think. I purchased two stackable milk crates from Home Depot (cost $18) and a square bamboo cutting board from Walmart (cost $20). The milk crates provide extra storage, but unlike draws which can open while driving, they don’t need any additional hardware to secure them. I attached rubber feet to the bottom of the cutting board so that it fits snuggly over the top of the upper milk crate. Instant table!
Windshield sun shade
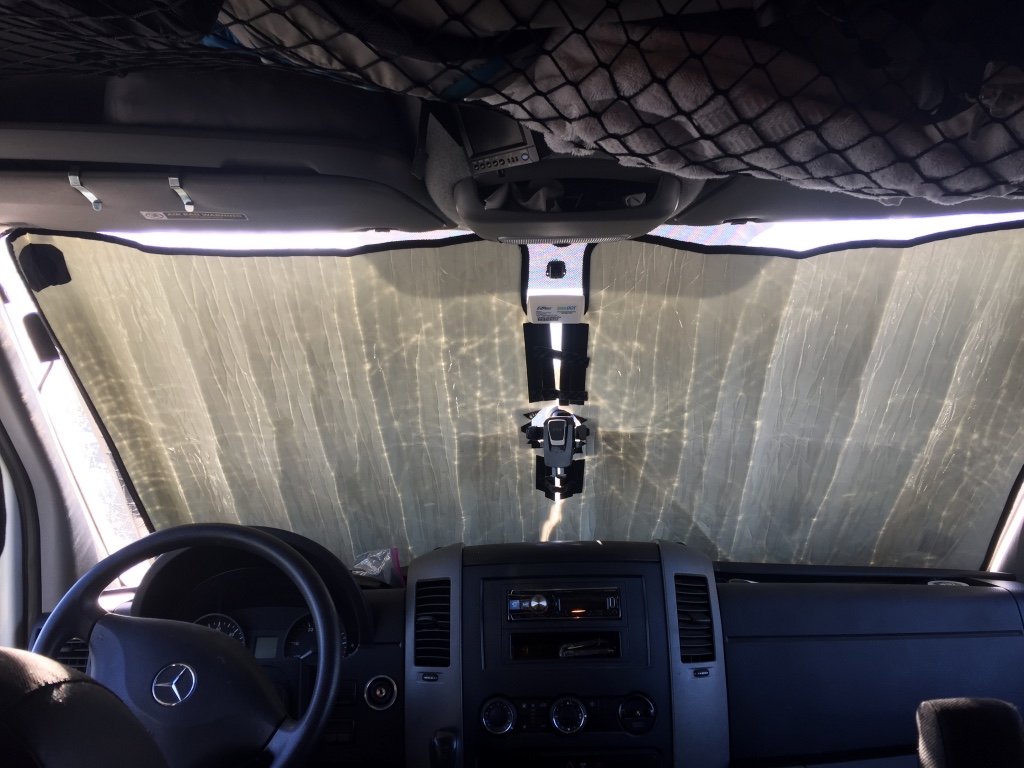
I purchased a sun shade for the front window, it provides privacy at night and some protection from the sun during the day. These shades are sold in almost any store that has an automotive department, but it’s hard to find the correct size for the Sprinter. I had to buy it online. The one I got is okay, but there could be something better out there. Mine is kind of stiff and hard to roll up at first, but softened over time. It also doesn’t stay in place by itself. I taped neodymium magnets to the windshield and the back of the shade, in order to resolve this problem. 3M VHB tape to the rescue! Definitely buy yourself a few rolls of this stuff, I use it for everything, including securing the solar panels to the roof!
Storage lighting
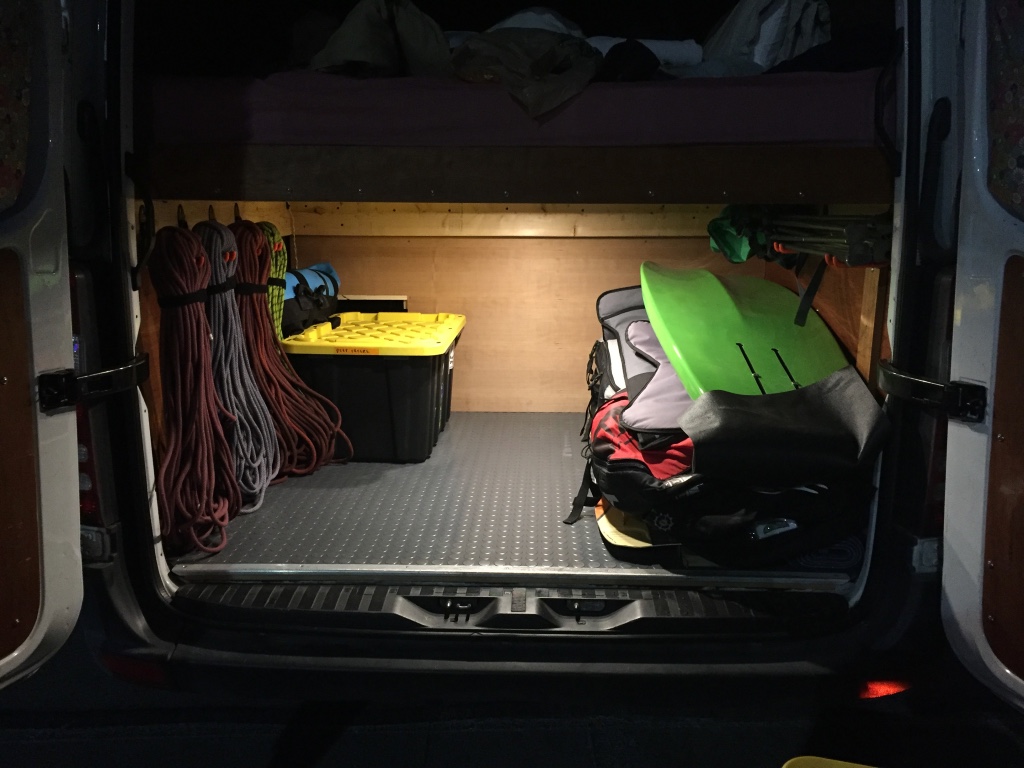
I frequently come home late after a day of climbing or kiting and want to put my gear back into storage. For this reason it’s really nice to have lighting under the bed. I bought some bright white LED puck lights (3000k color temperature) and secured them to the struts of the bed frame. I clipped off the AC adapter and wired them straight to the fuse box on my electrical panel. There are tons of options out there any they all work the same. Mine came with an inline switch and two brightness settings, which is nice, but not totally necessary.
Phone mounting
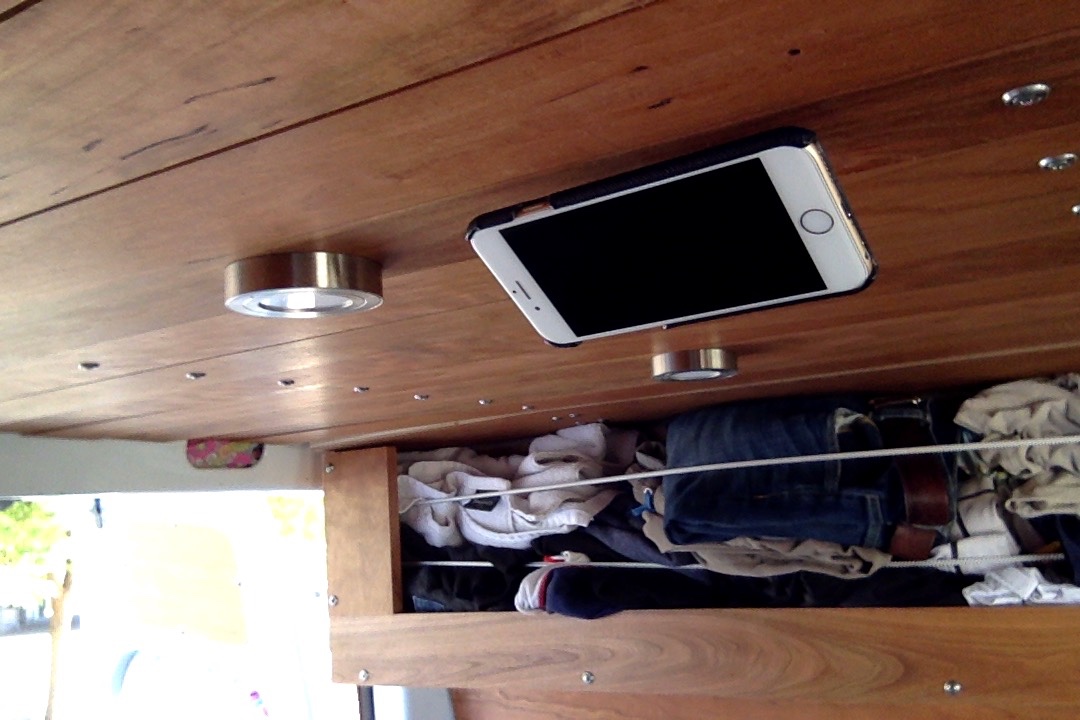
I thought this was pretty clever. I installed a Steelie magnet ball on the ceiling of the van over the bed. I keep an extra phone case with the Steelie magnet adapter under my pillow. Instant flat screen TV over the bed! I also have an iOttie mounted to the windshield over the dash, which I highly recommend. I’ve been over many rough roads and extreme climates and this thing has never fallen off, not once.
Well that’s it for now, things have settled down as far as van mods go. Everything has been working quite well and I’m pretty comfy in my hackable home!
